Connect to a Subject
Create a Subject
data.uecore.io:4222
This is the server DNS to connect a client to UE Streams
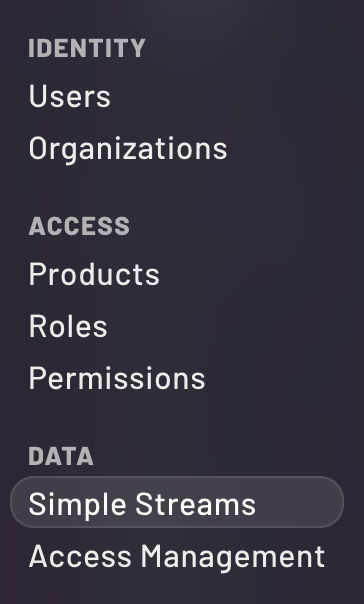
Begin by logging into the portal and clicking "Simple Streams" on the left navigation.
When the streams window opens, you'll see two tab options at the top. The default will be "Streams" and next to that will be "Subjects". Click Subjects. This will switch the subjects only view.

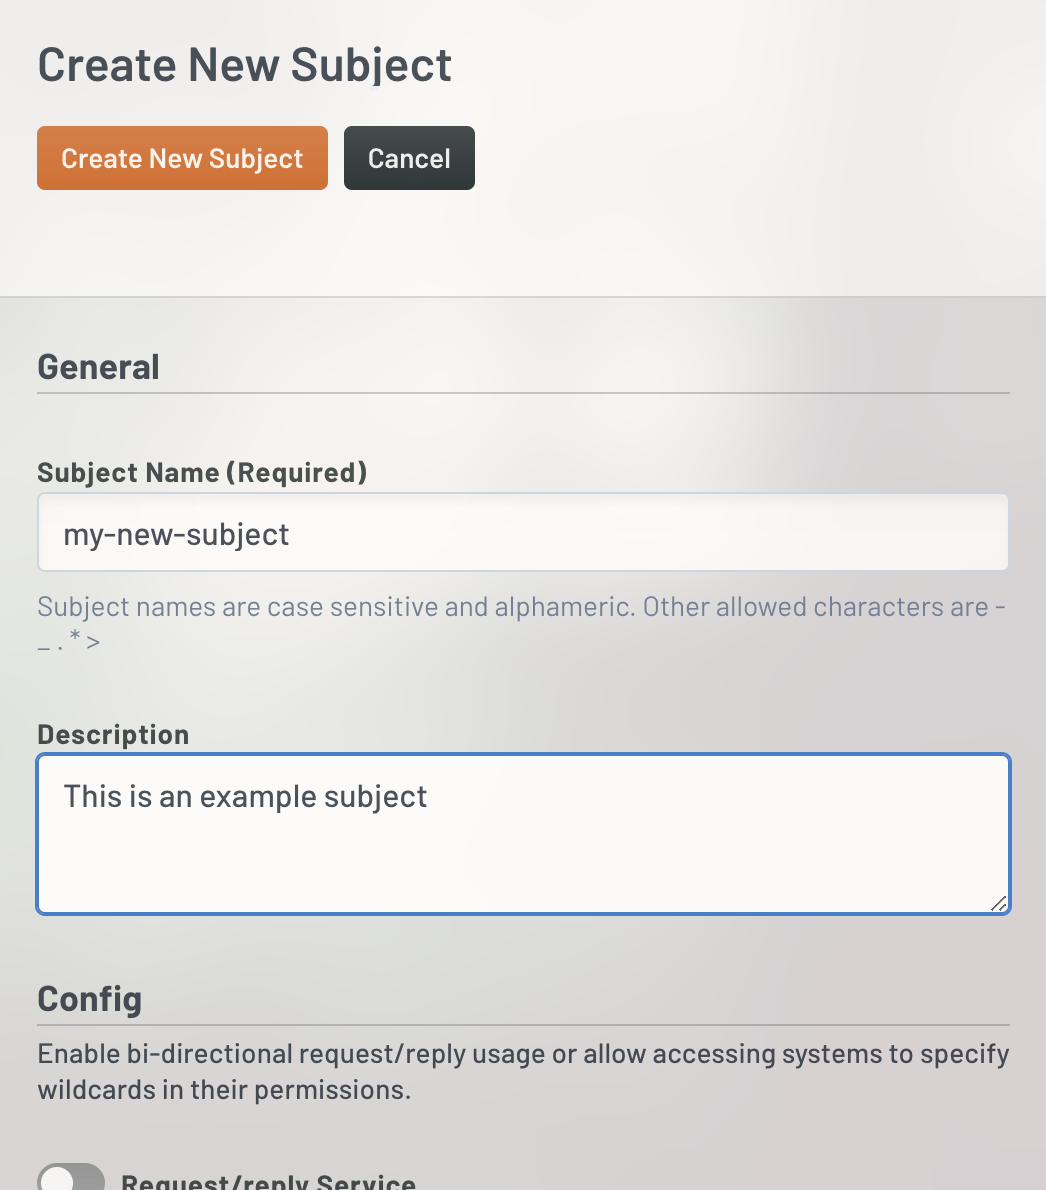
Click the new subject button and fill in the fields on the right panel as shown. Notice that there are no spaces in the name. Spaces are not allowed.
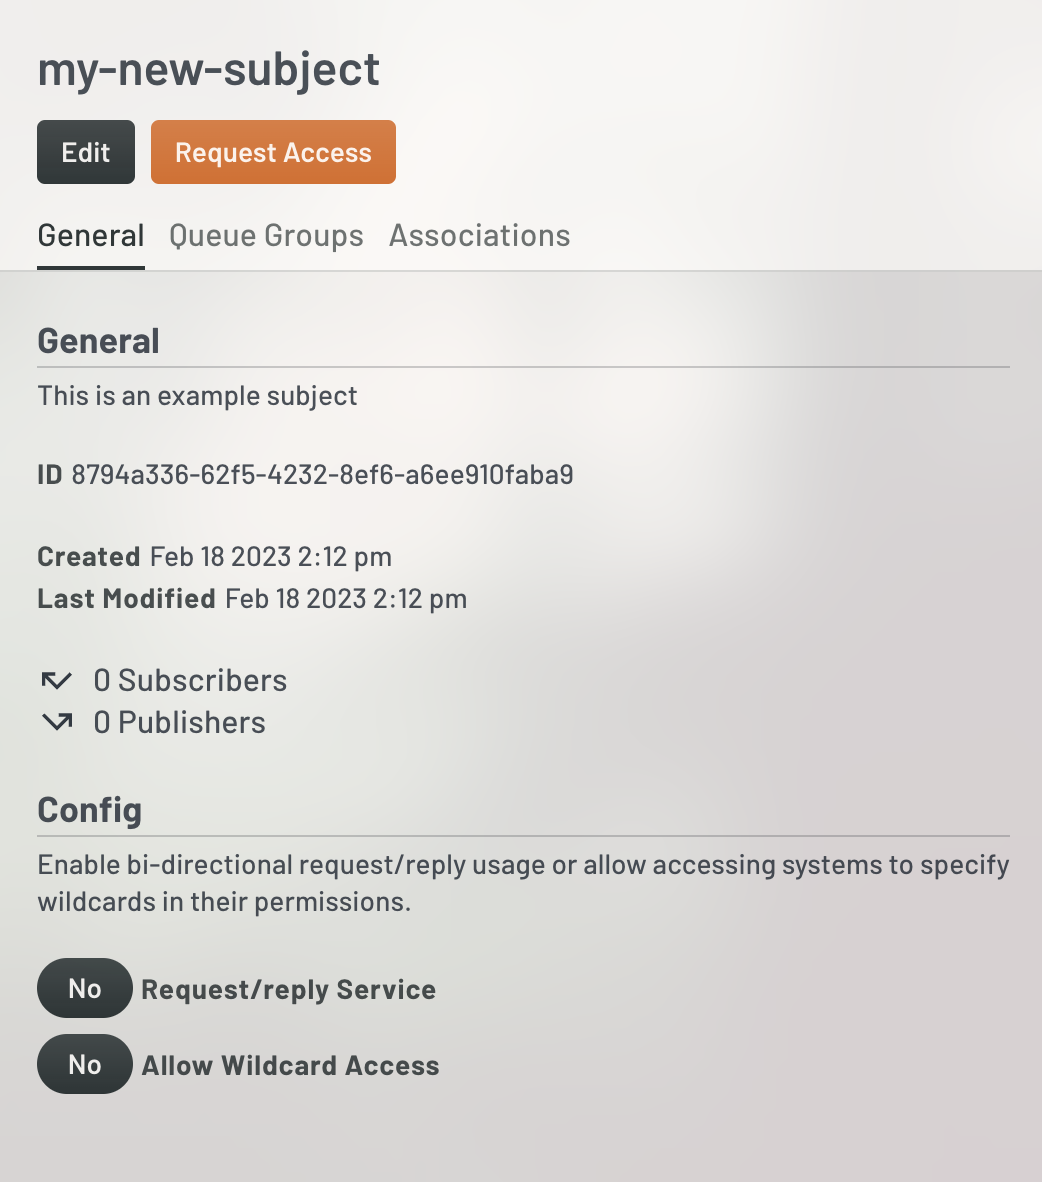
This will create the subject and you'll now see it on the list of available subjects in the left panel of the window. If you select the card, the right panel will shift to show the current configuration of the subject and provide you with buttons to edit or request access.

Request Access
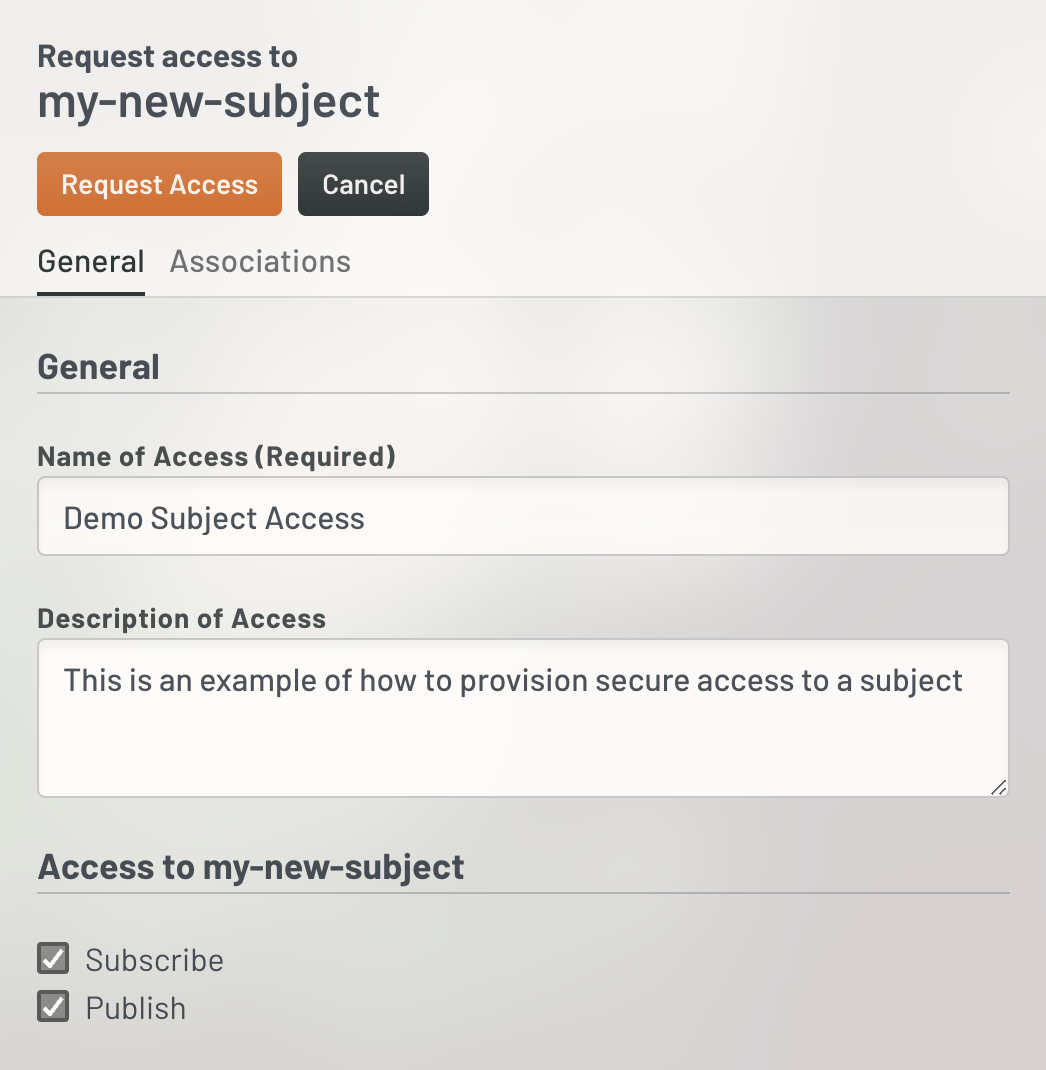
Connecting to this subject is as simple as clicking "Request Access". Click the button and fill in the form as shown. We are going to request both publisher and subscriber access to this subject. You can ignore the advanced configurations for now.
This will result in a success window with some information shown. Scroll past each screen shot for a breakdown of the information.
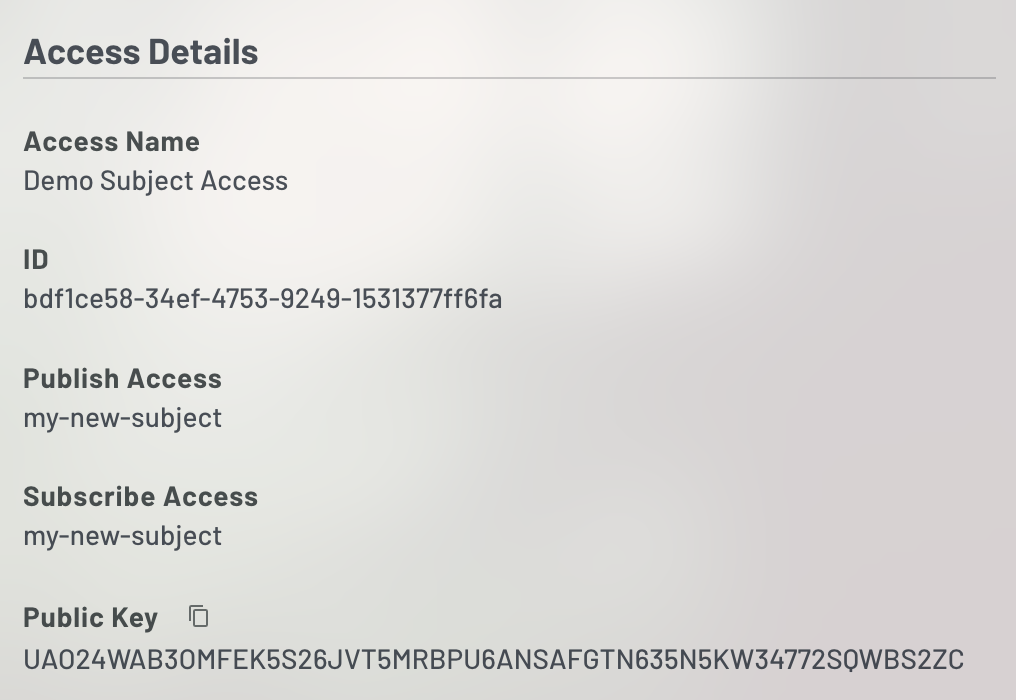
- ID - This is the internal UE Stream identifier for this access record
- Publish Access - This shows to which subject this access record can publish
- Subscribe Access - This shows to which subject his access record can subscribe
- Public Key - This is the public key for the secret seed needed for the connection. Within the UE Stream API, ID and Public Key are interchangeable for most requests.
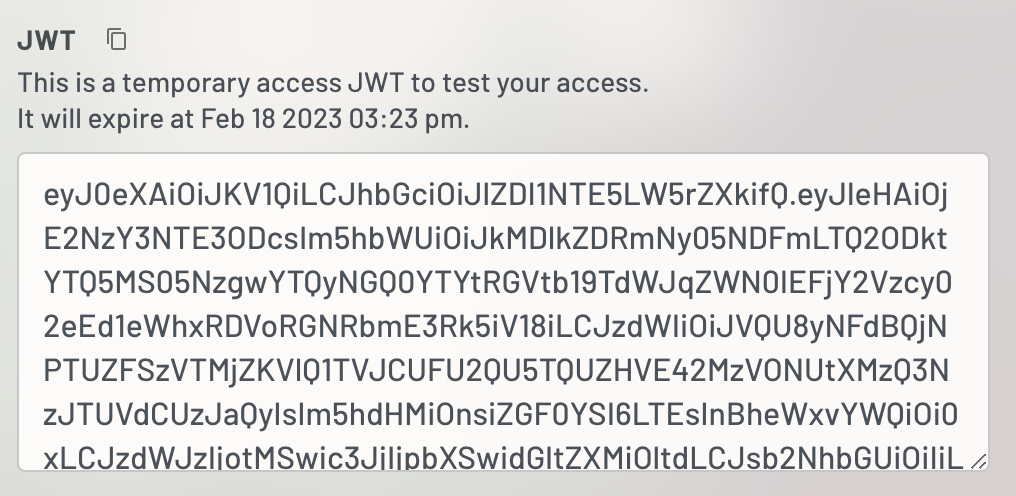
In order to connect to this stream, you will need a JWT and a Seed (below). The JWT is a representation of all of the permissions associated to this access request. If you were to decode the JWT, you would see the breakdown of your access (not shown - you can copy it into jwt.io if you are curious).
The JWT is set to expire and with UE Streams, this is always the case. For sustained connections, you are expected to utilize the Client ID and Client Secret shown below to continuously refresh the JWT. It is provided here to allow a quick connection and debug.
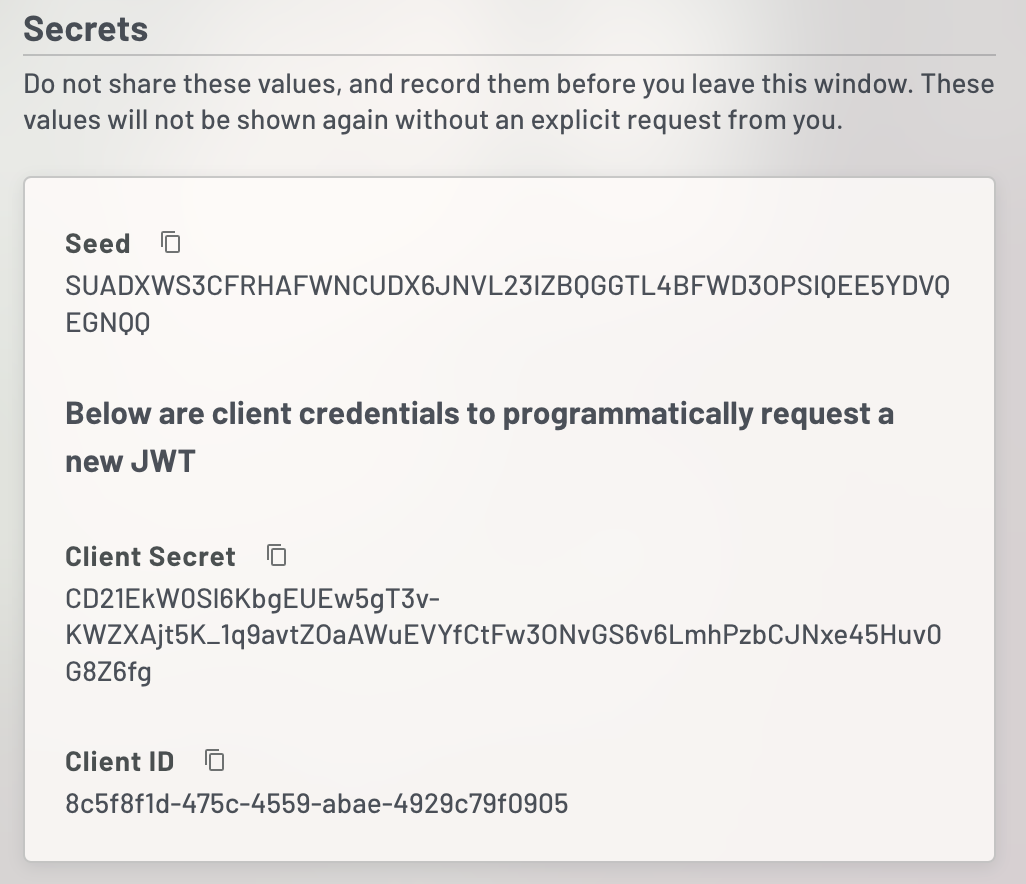
NEVER SHARE OR POST THESE VALUES
The image depicts data that is not active as a learning tool. You should never share or post the Seed or Client Secret in a non-secure environment. Doing so might allow someone to gain access to the data stream.
- Seed - This is the private key value that is required to make a secure connection to the subject using one of the open source clients.
- Client Secret - This is a client credential secret to allow new JWTs to be requested from the JWT API. Instructions on how to do this are provided under the Sustained Connection section of this page.
- Client ID - This is the client credential id for to allow new JWTs to be requested.
Hello World
This hello world example will show you how to use the provided Seed and temporary JWT to immediately connect to the subject, listen to messages, or publish a message, as an example. The example is in Node.js JavaScript.
Publish
const {connect, StringCodec, credsAuthenticator } = require('nats');
const sc = StringCodec();

const natsServer = 'data.uecore.io:4222';
const subject = 'my-new-subject';
const jwt = 'COPY-YOUR-JWT-HERE';
const seed = 'COPY-YOUR-SEED-HERE';
const credentials = `-----BEGIN NATS USER JWT-----
    ${jwt}
  ------END NATS USER JWT------

************************* IMPORTANT *************************
  NKEY Seed printed below can be used sign and prove identity.
  NKEYs are sensitive and should be treated as secrets.

  -----BEGIN USER NKEY SEED-----
    ${seed}
  ------END USER NKEY SEED------
`;

(async () => {
    try {
        const nc = await connect({ debug: true, servers: natsServer, authenticator: credsAuthenticator(new TextEncoder().encode(credentials)) });
        for(let i = 0; i<10; i++) {
            const obj = { message: `hello world ${i}`};
            // message must be a string
            const message = JSON.stringify(obj);
            nc.publish(subject, sc.encode(message));
            console.info(`Published ${i}`)
        }
        nc.drain();
    } catch (error) {
        console.error(error);
    }
})()
Subscribe
const {connect, StringCodec, credsAuthenticator } = require('nats');
const sc = StringCodec();

const natsServer = 'data.uecore.io:4222';
const subject = 'my-new-subject';
const jwt = 'COPY-YOUR-JWT-HERE';
const seed = 'COPY-YOUR-SEED-HERE';
const credentials = `-----BEGIN NATS USER JWT-----
    ${jwt}
  ------END NATS USER JWT------

************************* IMPORTANT *************************
  NKEY Seed printed below can be used sign and prove identity.
  NKEYs are sensitive and should be treated as secrets.

  -----BEGIN USER NKEY SEED-----
    ${seed}
  ------END USER NKEY SEED------
`;

(async () => {
    const nc = await connect({ debug: true, servers: natsServer, authenticator: credsAuthenticator(new TextEncoder().encode(credentials)) });
    const sub = nc.subscribe(subject);
    for await (const m of sub) {
        console.log(`[${sub.getProcessed()}]: ${sc.decode(m.data)}`);
    }
})();
If you run the subscribe script and then separately kick off the publish script, you'll see your messages come through the subject to your subscription.
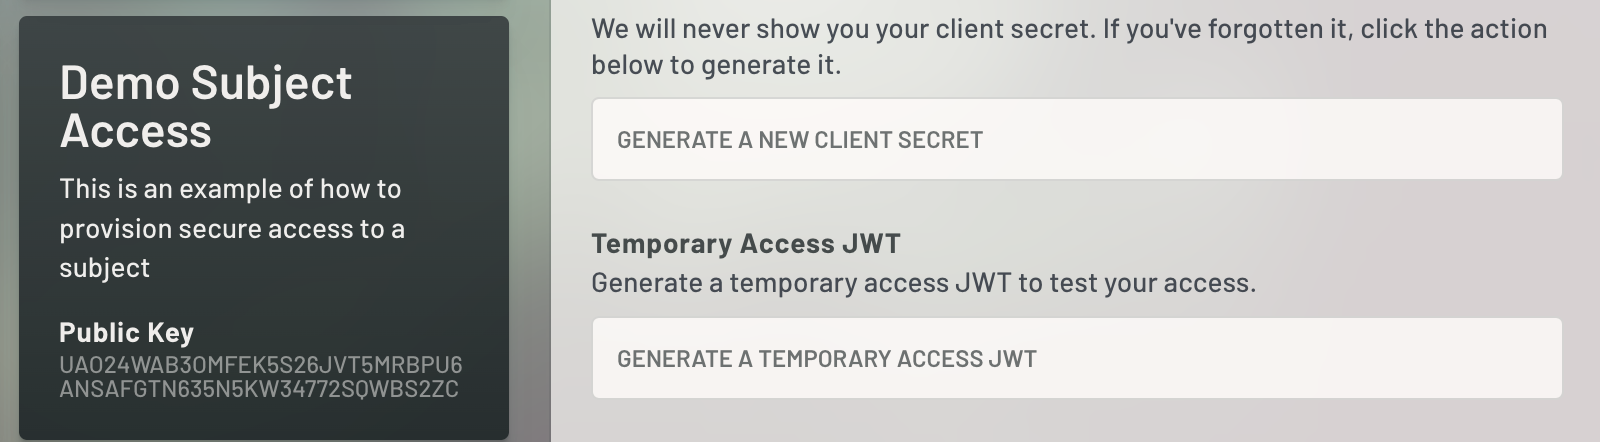
If your JWT expires and you're still just debugging, you can click "Access Management" on the left nav of the portal, find your access object, and click
"GENERATE A TEMPORARY ACCESS JWT".
Sustained Connection
Creating a sustained connection is not significantly different from the hello world demo above. The main difference is that you'll need two extra steps. First, you need a function which can request access to UE Streams through UE Auth and then request a JWT from UE Streams. Second, you'll need to update your connection to catch authorization errors that occur when the JWT expires so you can update the JWT and reconnect. We can think of the whole flow like so:
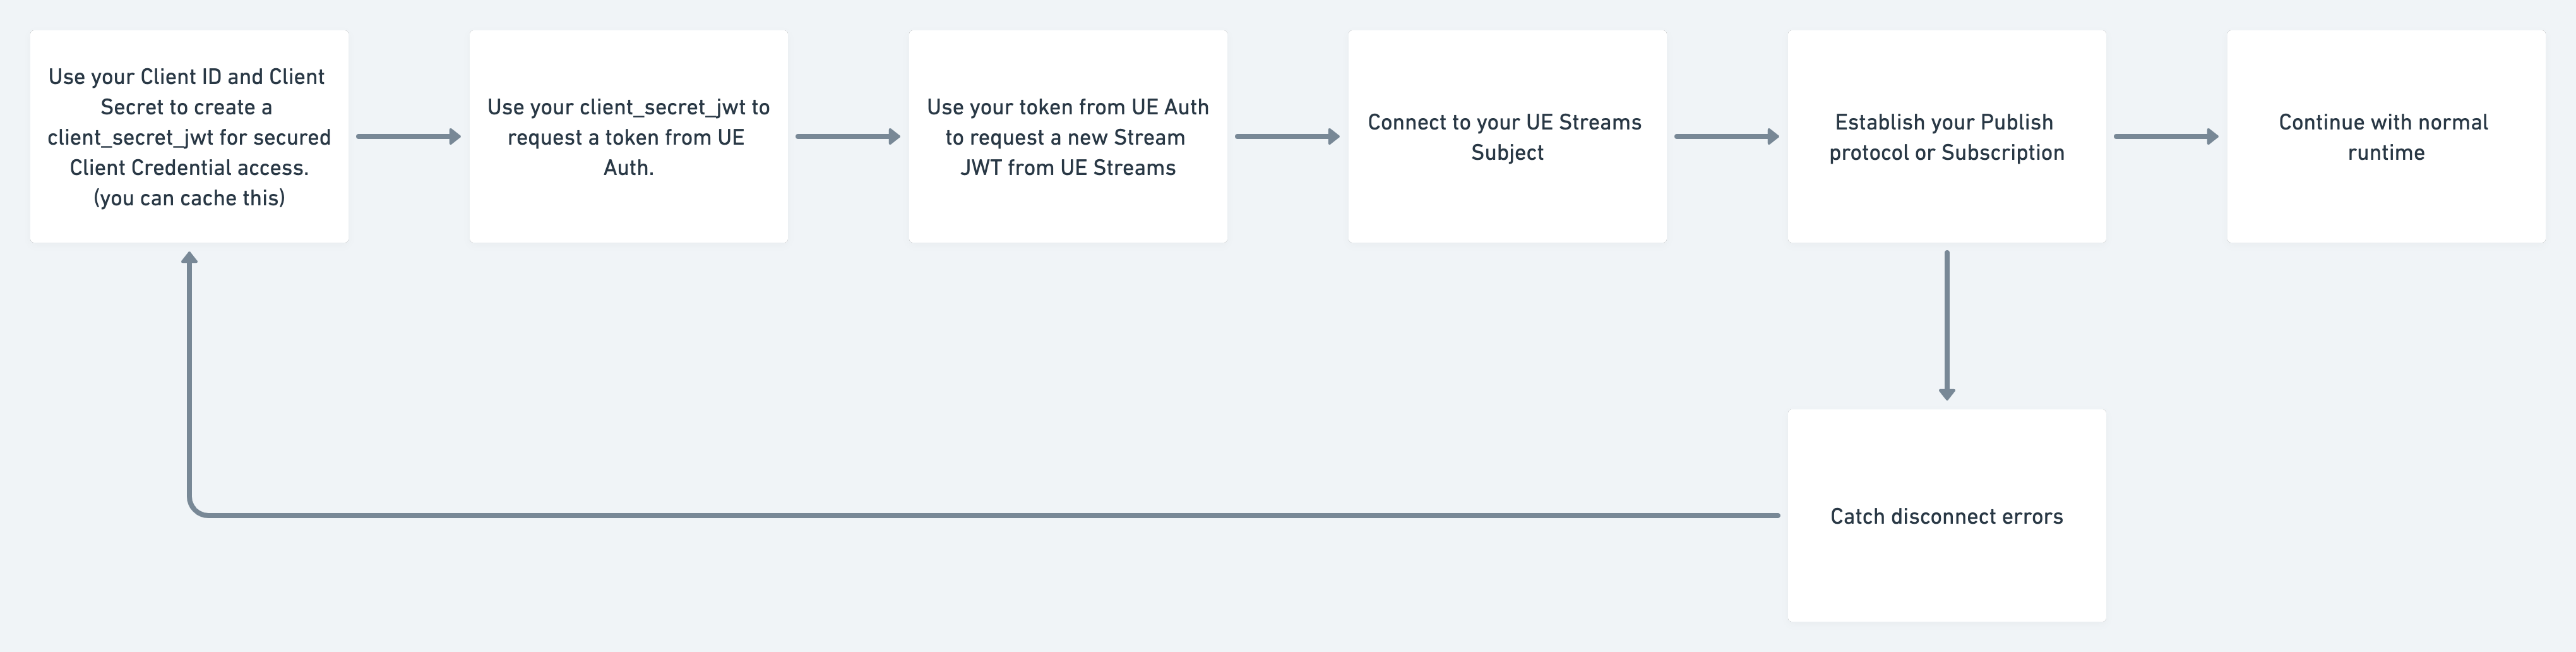
For a detailed code example checkout the recipe for this approach!
Updated almost 2 years ago